Oberloh Woodwind and Brassworks handles a lot of finely made French Horns. We only thought it fitting that we share some of our grief with the rest of you!
The above instrument is an early 1940's Conn 8D. Yeah, it's a real basket case...we know! To those players out there in the know, this is an extremely desirable french horn. We began restoring this instrument immediately upon its arrival to our shop, and will be showing you the completed work at the end of the Current Projects pages. But first we're going to give you an education on how such messed up horns can be made to look magnificent once again.
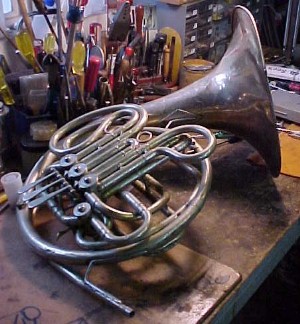
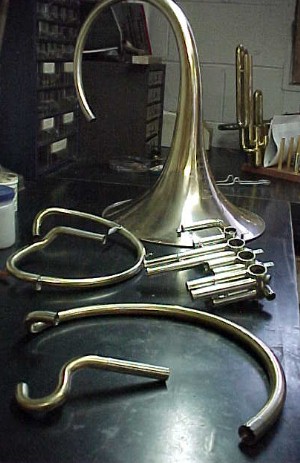
This particular french horn is one of those that you don't see very often. In fact, we have only seen 3 variations on this particular model in the last 5 years! It's a circa 1907 Ed Kruspe compensating double horn. Sadly, its owner had a mishap and the poor instrument got a flying lesson. Severe damage was inflicted on the bell rim and flare. The mouthpipe and branches, as well as the valves, were showing considerable wear due to its extreme old age. In the next several images, we will take you through the processes involved in making the appropriate repairs called for with respect to such a fine musical instrument.
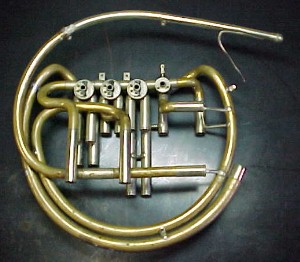
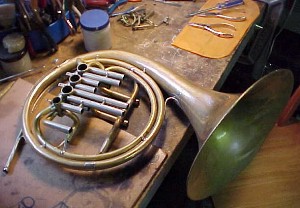
First things first: once the valves and slides have been removed, we begin by unsoldering the bell. This gives us plenty of room to perform the necessary dent work involved in the reformation of the flare. At this point we also take advantage to inspect the valveset and the remaining branches and slide tubes. Due to severe wear and tear, not to mention a lot of past bad repair work, we found it necessary to completely dismantle the entire instrument.

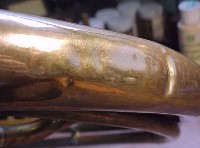
Scotch tape, radiator tape, plumber's tape, masking tape, silly putty and super glue don't make for good brass instrument repair materials! Once all this junk is removed, this is what we found. We understand the desperate circumstances surrounding a musician and their instrument; especially in times of need. However, these were only stopgap measures, and proper repairs should be addressed as soon as possible!
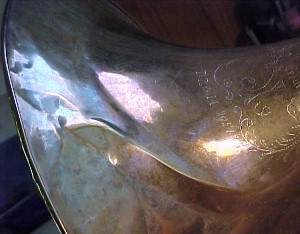
Well, what can you say? Dents, creases, cracks - the works! This is what we have to start with. And now, we are going to show you how its done...
|
|
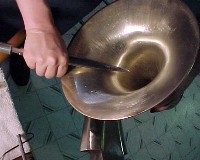
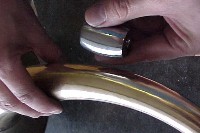
After the major creases have been softened in the flare, the tighter and more rigid parts of the crease need a bit more persuading. In these two images, hand burnishing is shown. This will prepare the bell for the final process where it will finally achieve its smoothest contour.
|
|
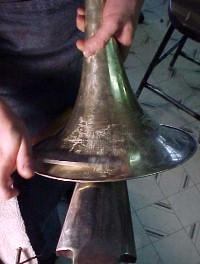
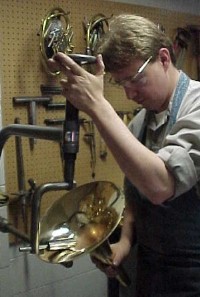
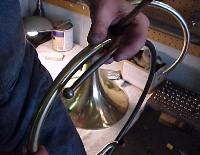
Following the hand burnishing process, we lightly polish the bell flare, allowing us to see the contour of the bell. We then employ the shop "dent machine". Here, Dan is seen running the bell between two surfaces; one being a polished steel roller, the other a polished steel shoe with a contoured shape. This particular tool has a screw assembly that applies a constant, controlled pressure on the bell surface from both inside and out. Rolling the bell steadily between these two surfaces results in a smooth, evenly shaped bell flare.
|
|
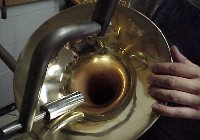
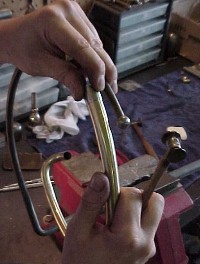
With the completion of the bell flare, the slow and arduous task of removing dents from the bell branch, as well as other internal branches, can begin. The two processes used are shown: the first being what we in our shop call "the barrel relay". The images shown are before and after shots of the first third of the bell branch curvature. A selection of literally hundreds of steel barrel-shaped dent balls are employed. One at a time, they are worked down the tube and wedged under the dent being addressed. Very slow, careful hammering is applied to the wall of the tube, slowly raising the dent. Once completed, another dent barrel is worked slightly further down the tube, and the process is repeated until the branch is totally dent free.
|
|
The other technique used in removing dents in branches and taper tubes is the use of a "dent rod". A specially formed steel rod is securely placed in a bench vise. A properly sized ball is threaded on to the end of the rod. The tube is then slipped over the rod, and pressure is applied from the inside against the dent in the wall of the tubing. Brass is soft, so in the case of a french horn branch, light pressure is sufficient enough to raise the dent. With the use of a properly shaped hammer, the remaining distortions can be softened with a few light taps.
Now we are finished with the removal of dents from the bell and additional body branches. At this point, we are ready to begin the valve refitting process. We continue with the restoration in Part 2.